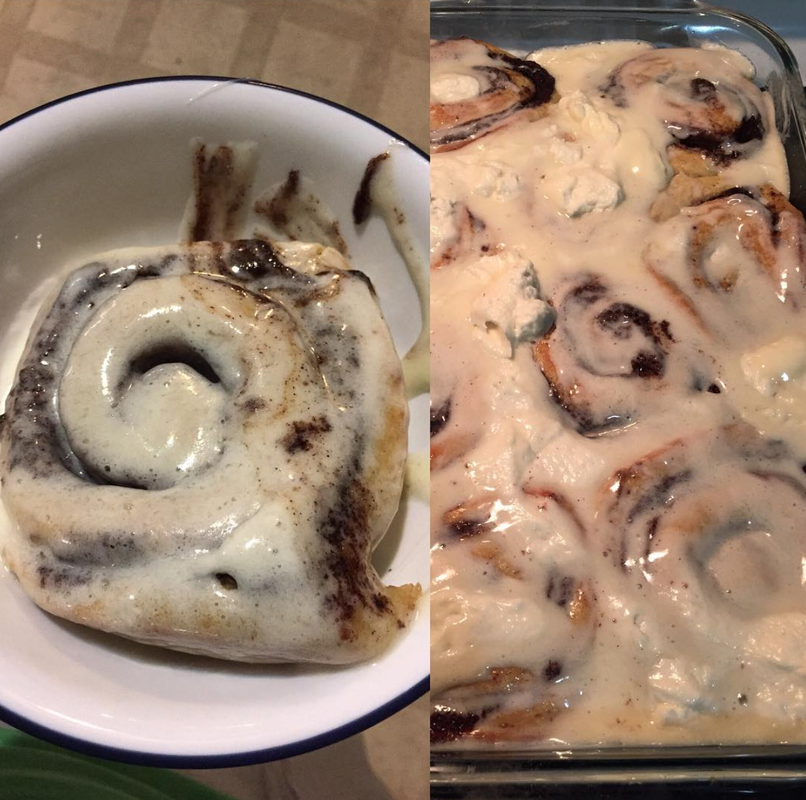
 Ok, so homemade cinnamon rolls sound harder than they really are and the length of my instructions may be scaring you a little bit, but, do not fret, I am just thorough! These cinnamon rolls are a weekend favorite at our house. I actually make an entire pan of them and leave them in the fridge and warm them up in the microwave (30-45 seconds) during the week for my boys. They are still wonderful five or more days later. My cinnamon roll recipe is a little easier than most I would say, because I use the breadmaker to do most of the dough work for me. If you have been following my Instagram you have probably noticed that breadwork is not my favorite. But I keep trying so that I eventually have a shot with Paul Hollywood (dreamy). The breadmaker mixes, kneads, and rises it for you. The whole recipe is also done is stages so it is not that bad. I usually start the dough for the rolls right after dinner and then I pull the dough out and construct the cinnamon rolls after the boys are in bed. Then when they wake in the morning I do the second rise/bake and make the icing. Although you can totally make the icing the night before and just leave it on the counter. DO NOT put the icing in the fridge or it will be like a rock when you pull it out for the next morning. I hope that these will become a favorite of your family’s as well and send me pics! Tag me on your photos on Instagram or comment here! I want to see those puppies! Original recipe based off of the one from this blog. Ingredients: Dough: 4 cups unbleached all-purpose flour 1/3 cup white sugar 1 tsp salt 1 Tbsp dry breadmaker yeast 2 eggs ½ cup melted butter 1 cup warm milk Filling: ¼ cup softened unsalted butter 1 cup brown sugar 3 Tbsp cinnamon Icing: ½ cup softened butter 1 oz cream cheese 1 ½ cup powdered sugar 2 Tbsp whipping cream 1 ½ tsp vanilla pinch of salt Dough Instructions:
Filling Instructions
Second Rise and Baking Instructions
Icing Instructions
0 Comments
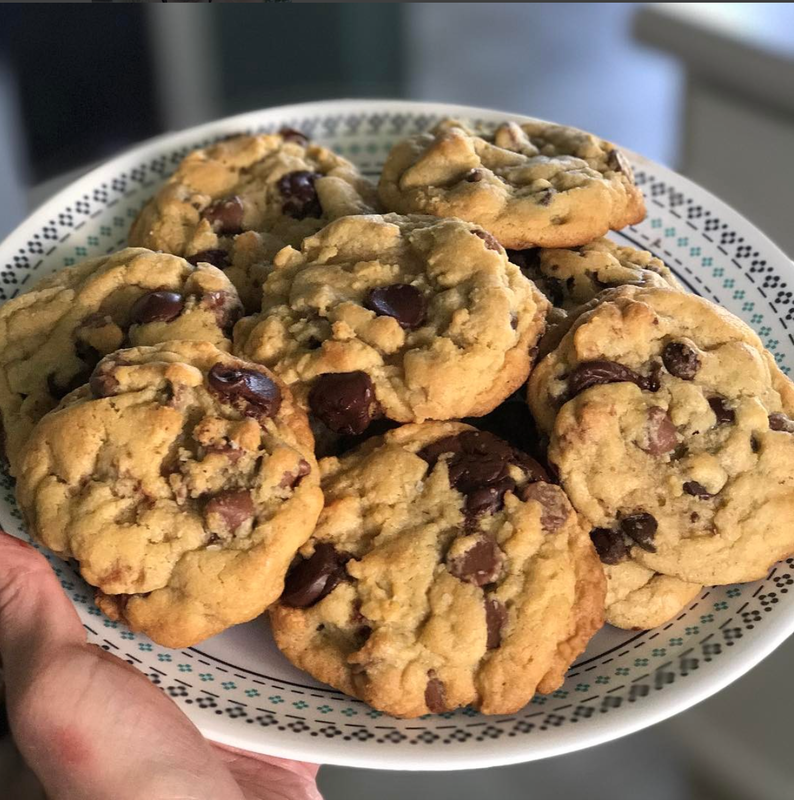 My husband is the biggest chocolate chip cookie snob. So I knew that if I was going to attempt a new chocolate chip cookie recipe I needed to pull out the big guns. I kept seeing pins on Pinterest for the New York Times recipe and how amazing this recipe was, so I decided to give this one a shot. The pictures looked impossibly appetizing (see above). To start this recipe off you may want to know that you are going to need to get a few ingredients that you do not normally carry in your pantry and the dough is going to need to chill for 24-36 hours in your fridge. I did however make a quick batch of six to try it out and I will say they were right… it was worth the wait. The ones I made first were good but they were even better after. Also the sprinkling of salt on top is NOT optional it is what pulls the whole flavor together.
For the original recipe click here. INGREDIENTS
*If you do not have cake flour on hand you can remove 2 Tbl for every cup of all-purpose flour and replace it with 2 Tbl of cornstarch. ** The NYT recipe asks for something harder to find and more expensive. This is the best substitution but I would NOT sub these chips out for any others. Low quality chips makes for a low quality cookie. INSTRUCTIONS:
* You can use a different method for storing the cookie balls; this was just the one that worked best for me. Just be sure that it is covered and not exposed to a lot of air or else it will form a harder shell. 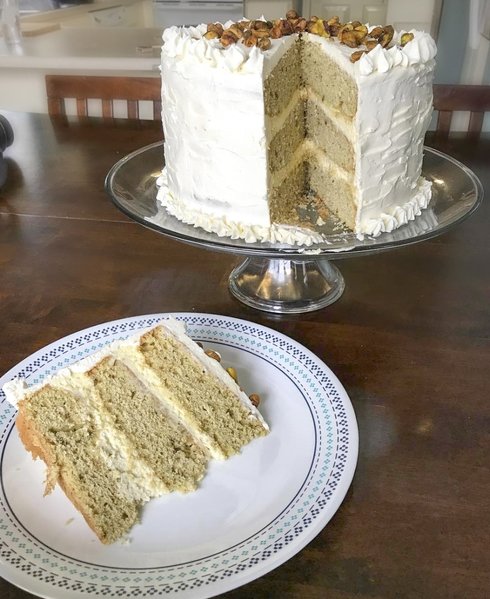 For Part 2 of my birthday cake post we will tackle the pistachio cake base. This cake base was DELICIOUS: light, airy, vanilla-y, and with a small amount of soft crunch from the 2 tbsp. chopped pistachios. However the recipe is quite strange; it has several different types of leavening agents, which I now realize is to combat the heaviness that the moist pistachios bring to the batter. The original recipe came to us from this blog, but I changed a few things to my preference. I hope you enjoy this cake as much as my friends and I did. Let me know if you try it out! I want to hear some feedback. Better yet, take a picture and tag me in your IG post @midnightcakery ! Happy Baking! P.S. Pictures with step descriptions are below the recipe. Ingredients:
Instructions:
|
AuthorJust a girl trying out recipes one experiment at a time. Archives
June 2018
Categories |
 RSS Feed
